The story so far
During my time at the Recurse Center, some people from the previous batch were working on this cool project called the ZeroPhone) The idea is really neat - you build an open source phone for $50! How cool is that?!
The folks were well on their way - they got the PCBs and components. They even got this Reflow Oven
It was interesting. I didn’t know that we could use an open for soldering. I have an electrical engineering degree, and never was I told of the existence of this fabled oven. For whatever reason, we soldered all our chips by hand in our engineering classes like plebeians. And we’re not talking about big chips here - super tiny radio frequency chips the size of 10 grains of sand. All done by hand. The amount of frustration I felt back then in my last semester of that class over 9000.
Then, the batch at the Recurse Center working on it ended, and one of my friends who was working on the project left for Europe. I asked him if I can take his parts and take over for him. He gave me his blessing, and I started working on it.
Here is where the story takes a dark turn. In the beginning there were around 7 people. After the Recurse batch was over, I asked the folks if they wanted to continue working on the phone after the batch. But the majority of the people had moved on with their lives and abandoned this quest. The people remaining were me and one other friend. Fine. It’s a two player co-op. But she was busy, I was distracted, and the commitment to the work was weak.
We had two working sessions total. One we made the fatal error of putting too much solder paste on the surface mounts and shorted the contacts for the buttons. Subsequently, the second session was undoing the negative work.
Anyhow, my comrade then ALSO LEFT FOR EUROPE! Hmm. Why do all the cool people leave for Europe?!
I tried to get the ZeroPhone ring reader back on board and also tried to do some recruiting. But no bites.
Now this has become a solo adventure, and I’m hoping that I can blog on my progress!
What I did for the last two weeks
Here is the crux of the problem: there are a lot of small chips to solder onto the board. One way is to use a reflow oven. Put some solder paste on the board, put the chips on, then put it in the oven. The oven will heat the solder paste to a high temperate and the solder paste will melt paste the melting point X, and then it will harden with the chip component.
Now the problem is placing the right amount of paste on so that there are no shorts. To do this, you either get a really small syringe and place it all manually.
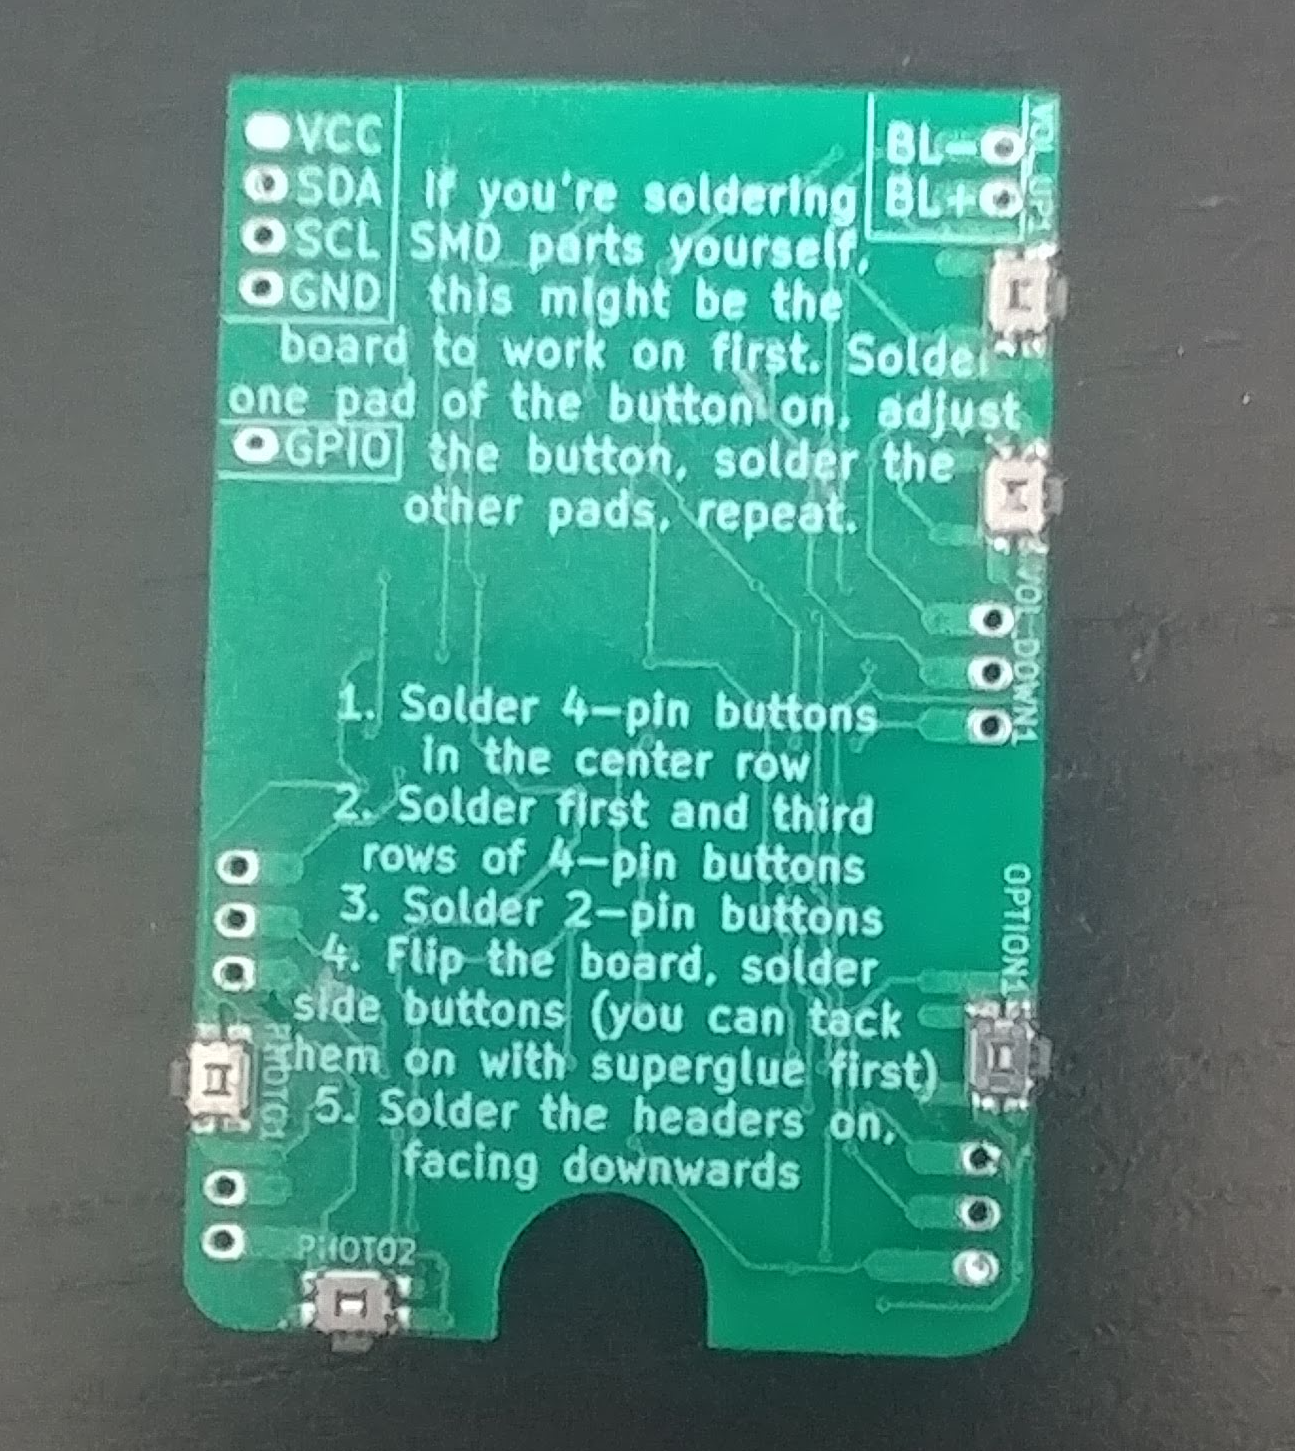
The other approach is to make what’s call a stencil. The premise is that you place a thin film with holes where the solder should go on top over the PCB, then apply solder paste on top of the stencil. Because the stencil has holes, the solder paste will cover the points where chips need contact with the PCB. Pictures are worth a thousand words - I’ll probably put a cool picture here later on to illustrate this in the future.
It seems like a no-brainer to use the stencil and oven approach! Not so fast.
One of the Recursers named Ben said he used a laser cutter and some special material to make this stencil. The class to learn how to use a laser cutter in a hacker space costs $75 dollars. It also costs around $2/minute for laser cutter usage. So it doesn’t make sense from an economic standpoint to go learn this stuff for a $50 dollar phone!
The other option is to solder all the parts manually. I thought about it, and decided that I was going to solder all the chips. I did it before - it shouldn’t be too hard right?
I proceed to take this path. I had a pretty strong start. I had a chip that now looked like this:
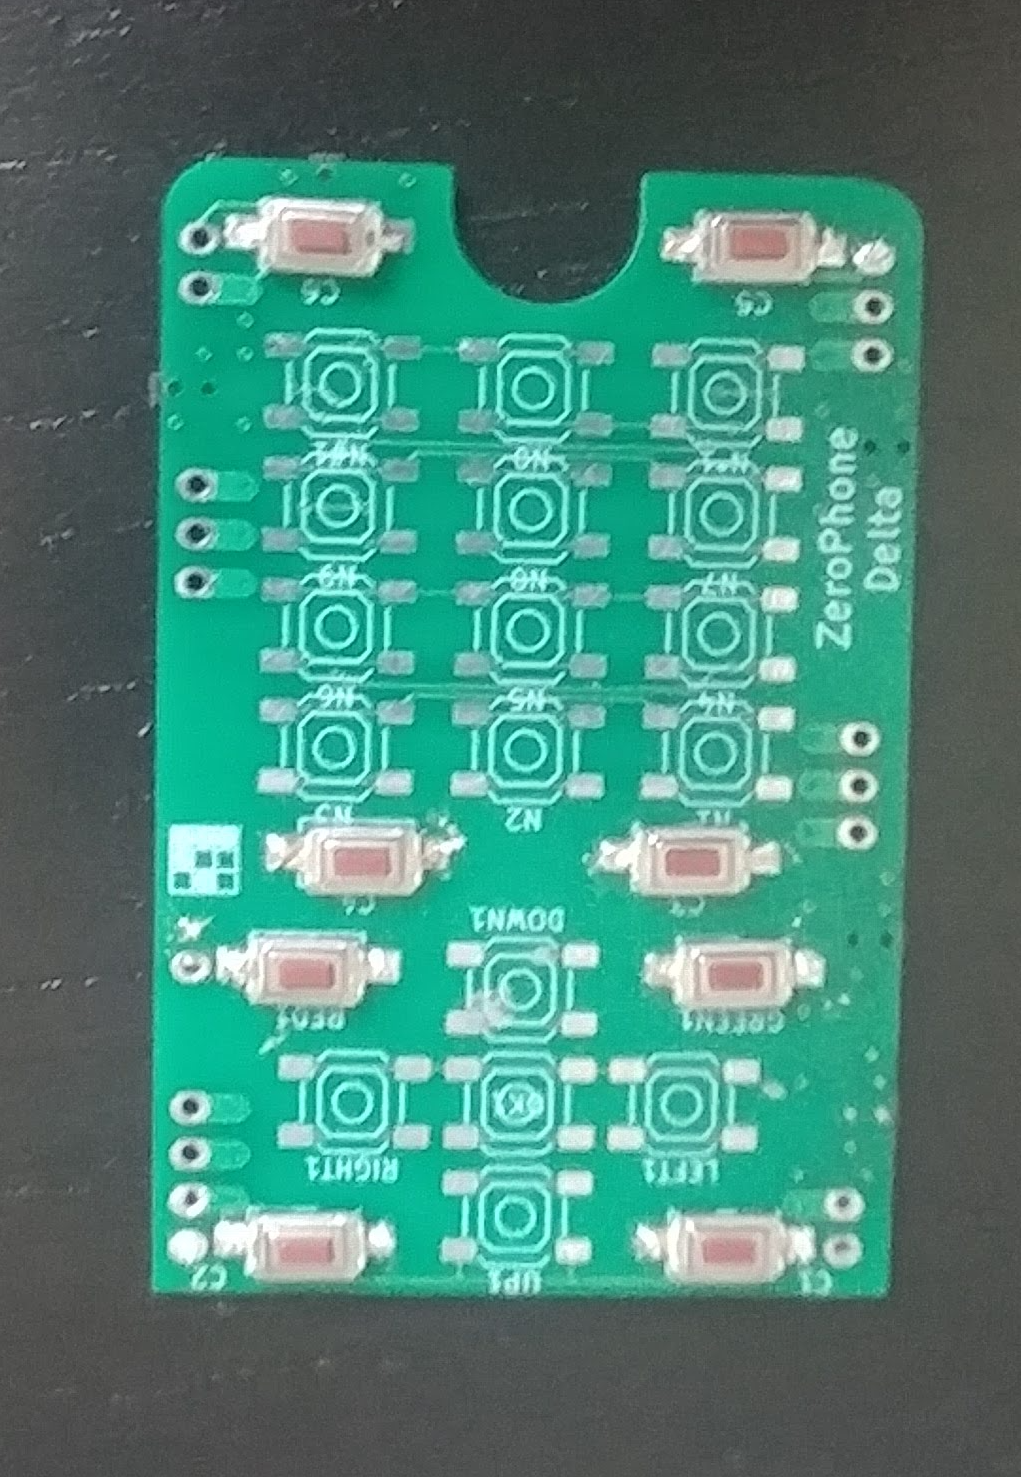
I was making good progress, until I got to a really small chip last Saturday. Ultimately, I ended up shorting that one. I tried removing it, but the solder tip was too dull. The usual technique of wicking all the solder was not working at all.
I tried to take the chip off, but struggled to do it I’m certain that the chip that I soldered is non-functional.
This led me to conclude that I need a stencil after-all..
The following Tuesday, I went to a Hacker space called Fat Cat Fab Lab to check out their laser cutter. Out of all the hackerspaces I’ve checked out in NYC, this one is actually my favorite.
I met this guy named David - a product engineer who seemed to have a decent amount of soldering experience. I told him about my ZeroPhone issues. He got curious, and looked up the PCBs online.
Then he looked at me and laughed.
“Dude, it’s like 4 chips! You can totally do this without a reflow oven. Why do you need a reflow oven for this?! Do it yourself. Just make sure you don’t get a shitty tip. THE SOLDERING TIP IS VERY IMPORTANT. I got a $300 dollar soldering station. The best choice ever! Those $30 solder stations? Not worth - they end up trashed in 3 months.”
He proceeded to take me to a soldering station.
“You see this?! This is NOT a good tip. Terrible. Also make sure you get lead solder and make sure it has a flux core. Your life is easier that way.”
He also said if I really want to opt for a stencil, I should order it online. Laser cutter maybe overpriced and overkill.
He’s right. There’s this website where you can order the stencil manually. https://www.oshstencils.com/
But maybe learning how to use the laser cutter is worth it if I’m lasering in the future.
At this point, I have to decide to solder, stencil, or laser. The laser cutter would be worth if I know for sure that I would need to use it in the future. One thing that concerns me is that I screw up the stencil by ordering it online, the project will be delayed significantly. I anticipate the turn around time to get the stencil may be long.
Long story short - I have a decision to make on how I approach this.
Now, for some rants =D.
Rant #0: The previous fellas decided it was a good idea to separate all the chip components by individuals. Mr. Panda would have one bag for all his phone components, Ms. Giraffe would have all her components in one bag, and Dr. Zebra one bag for all his components. This is interesting. During my time in school we never organized this way - we only took the chips from their bags when we were putting them on our PCBs. Why this is a problem? Because it’s really hard to find my components - I’d rather have things organized by component than scouring through my baggy and emptying out every time I’m working. Also, I failed miserably trying to solder that one difficult chip. Pretty sure it’s fried.
Surprise! There’s no more extra chips of that type! Yeah. Life lesson: Always have backups, and multiple chips when you’re doing electrical stuff. You will screw up. Oh I’m sure.
Rant #1: There has to be a better way to do this for all hobby electronics makers. It’s bullshit that 50% of the time is spent not on designing chips but part sourcing and soldering fine chips that bring you closer to blindness. We need a pcpartspicker but for electronics. We need to be able to put an order, and not also wait two weeks to get a PCB to our doorsteps. We need to not spend half our lives putting chips with a stupid iron pen and fill our lungs with cancerous smoke. Someone out there reading this - please build this. Or let me know if you want to team up and try it.
Perhaps we just have to wait for robots. A robot to do all this stupid soldering would be sick. I hope I’m alive to see this - what a joy it would be.
Rant #2: All the tutorial videos on Youtube are excessively long. I swear, if they can cut it to half the length and show all the important points that would be great.