I have a desktop computer I’ve built back when I was in college, and it’s been nothing but awesome. A couple of months back I used it so that I can log in through ssh using a couple of neat programs. I set this up, and I thought it was the coolest thing ever.
Suppose you’re in Thailand, and you want to be able to login to your GPU’d desktop. You can! But you just have to make sure you login using Linux… Yesterday, I tried to login from a local library to play around with some machine learning. There’s a dataset I’m looking at, and it’s >10 GB! There’s no way my puny laptop can handle that much processing. It’ll heat up.
Anyhoo, I tried it again after I haven’t used the GPUs in a while, since I’ve been up to making an Electron app, among other things. I tried to do it again and I was just so last.
After hours of fumbling around, and reading a bit more on the actual topic, I was able to get it working again. Last time, I wanted to write a post for myself and posterity, but never got around to it. But I’m going to do it this time!
Approach
First, I’ll explore the theory behind each broad strokes procedures in diagram form(as pictures are worth a thousand words) then I’m going to do the entire procedure on my laptop with another computer being the server, and put screenshots and commands in step by step.
Part One: Setting up No-IP
Part Two: SSH
Part A: Session Key Establishment
We don’t do any work on this, the ssh program does all of this for us. But I decided to read a little on it anyways and made this diagram, which will be revised if I get around to recalling all the actual details from my undergraduate days…
.png)
Part B: Authentication
To make sure that’ we know we’re making contact with the appropriate party, after the session key is established, you can login with userid and password. In lieu of the password, you can generate what’s called a public-private key pair.What’s nice about this is that you don’t have to type those dank passwords and get error messages and crap. You just log in.
Public Private Keypair
To do this, you generate a public private key pair. The rule is: you keep private key yourself, but are free to share the public key with anyone.
You can encrypt a message with a public key, and only decrypt with a private key. Example:
.png)SSH Authentication
Now this part is the most relevant for our setup. I’ll try to number the steps, and afterwards, go on my computers and document the steps required.png)
Application
Finally, this is where the real fun starts.
-
Because the IP provider doesn’t give us a permanent address, it could change at anytime. We need an intermediary to send our ip address, and this intermediary needs to reroute the IP address back to the requester. It kind of looks like this:[Picture to be added later]
-
To do this, we need a service to constantly update the IP that our internet service provider feeds us. For this, we can use a service called No-IP(https://www.noip.com/). Make an account, and create a hostname:
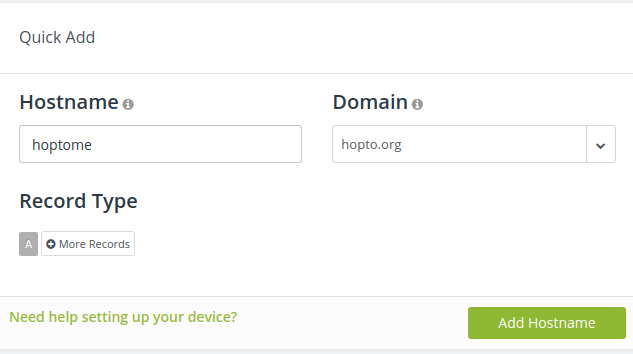
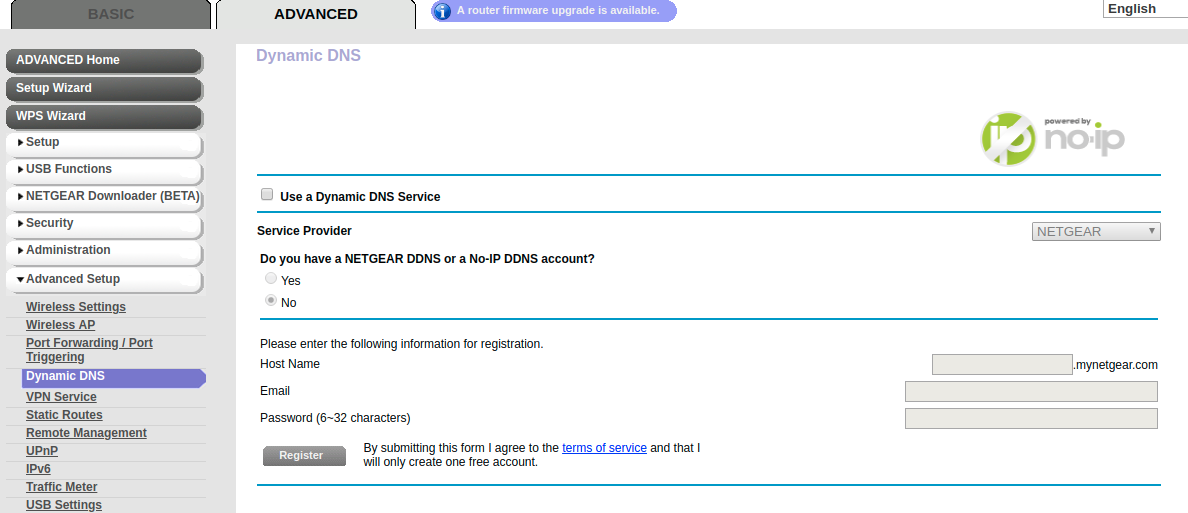
Alternatively, you can get a Hostname and domain if your router provides you one. for my router, Netgear allows me to have a separate Dynamic DNS Service name, which is described in the section below.
-
You also need to setup your router configurations:
A. For this, I went to my routerlogin.net -> went to advanced-> advanced setup, and opened up port 22 for ssh. TCP/IP ports(if I recall correctly, for this I went to my router’s webpage routerlogin.net, went to advanced and filled out the necessary details)
B. Optionally, you can setup the hostname under the router company’s sub-domain name instead of using one from no-ip (which has restrictions on the number of DNS routings, and unintuitive domain names).
-
Download and install the software on the server for no-ip. This is used to ping the no-ip DNS servers and update the entry to point to the local ip address. Follow the instruction here: https://www.noip.com/support/knowledgebase/installing-the-linux-dynamic-update-client-on-ubuntu/
Below are the commands to install and update the client:
- /usr/local/src/
- wget http://www.no-ip.com/client/linux/noip-duc-linux.tar.gz
- tar xf noip-duc-linux.tar.gz
- cd noip-2.1.9-1/
- make install
- /usr/local/bin/noip2 -C
- /usr/local/bin/noip2
-
Install ssh authentication for your server. That way, you’ll be able to login without specifying the password. First, you want to generate a public and private key pair on the client machine:
ssh-keygen #generate client key
cd ~/.ssh
-
Next, if you’re on a mac, add the private key to your keychain. I’d imagine you’d have to do some command to add the private key to your ssh-client, depending on your operating system.
ssh-add -K battlestationYou must do this EVERY time you restart the machine, since you have to load the key into memory. It may be good to just put it in your .bashrc file so you don’t have to remember to do so.
-
You have to then transfer the public key into your server. This can be done using a flash drive, a secure storage service, or login directly to the user with password, and then transferring the public key: I think this instruction is a good one(https://www.linode.com/docs/security/authentication/use-public-key-authentication-with-ssh/), but I used a flash drive to transfer battlestation.pub into my server computer.
-
Next, add the public key to your ssh server.
cat battlestation.pub >> .ssh/authorized_keysFinally, start the ssh server. On your server(additional instructions: http://ubuntuhandbook.org/index.php/2016/04/enable-ssh-ubuntu-16-04-lts/
sudo /etc/init.d/ssh start sudo service ssh restart -
Modify your ~/.ssh config to include your new domain. For example: mynewdomain.mynetgear.com
Host bs UseKeychain yes AddKeysToAgent yes Hostname yoursubdomainname.mynetgear.com User me IdentityFile ~/.ssh/battlestation -
also remember to clean our your known_hosts file in .ssh, if you’ve attempted this more than once and have unclean known__hosts file:
ssh-keygen -R hostname
-
Finally, I was able to login! Now I’m able to login to my desktop to do machine learning on anywhere in the world!
References
- https://serverfault.com/questions/107433/why-does-a-ssh-public-key-sit-on-the-server-and-not-with-the-client
- https://www.digitalocean.com/community/tutorials/understanding-the-ssh-encryption-and-connection-process
- https://www.linkedin.com/pulse/understanding-ssh-encryption-connection-process-robert-althof/
- https://www.digitalocean.com/community/tutorials/how-to-configure-ssh-key-based-authentication-on-a-linux-server
- https://help.github.com/articles/generating-a-new-ssh-key-and-adding-it-to-the-ssh-agent/